Kids in the Capital

Flashback: Remembrance Day Parade

This post was originally published November 6, 2010. With this week being National Veteran's Week and Remembrance Day Friday, we wanted to do our part this week to honour those who have served Canada. Thursday we'll be sharing a list of local Remembrance Day parades and memorials throughout Ottawa. *****

by Sara

We took the 4 year old firefighter and the 2 year old monkey to their first Remembrance Day parade in 2008.  At the time, the firefighter was only 2 and a 1/2 and the monkey four months old.  We were going to try to explain Remembrance day to the firefighter but realized there were no words simple enough for him to understand its magnitude and significance.  Instead, my husband and I explained that we were going outside for the morning to do something together and left it at that.

We chose a spot at the entrance to the memorial so that our eldest was occupied watching all the diplomats cars arrive, many with motorcycle escorts.  Its important to both of us that our kids grow up with an understanding and respect of what November 11th signifies; however, at the age of 2 and a 1/2, we wanted the event to be enjoyable.
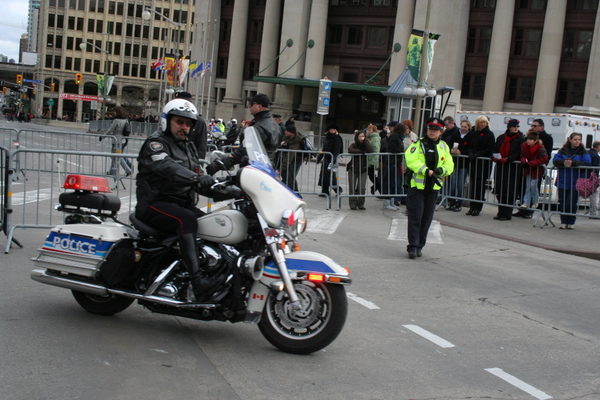
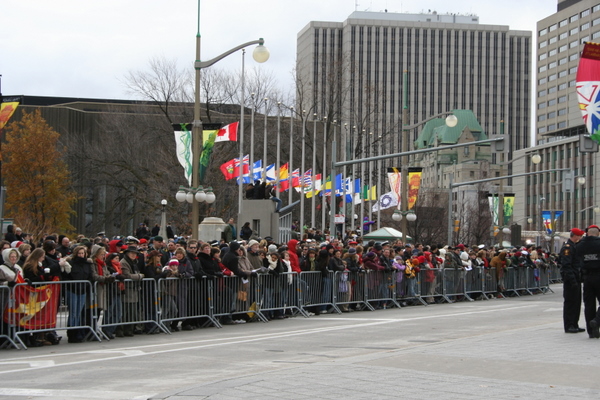
We dressed in snow suits and brought blankets and snacks.  We chose to arrive early so we could be close to the gate but we also left early to avoid the crowds.  The War Memorial is busy on Remembrance Day and it can be difficult to see, especially for small kids.  The only warning I have, aside from the cold weather, is the fighter jets that fly overhead.  Both boys were overwhelmed by the noise.
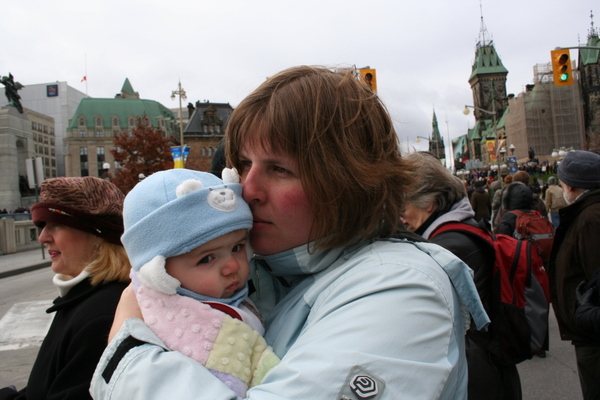
I think the most challenging thing for parents when participating in Remembrance Day activities is explaining the significance and history of the event in age-appropriate terms.  When the firefighter was three we asked what he knew about Remembrance Day and war.  He knew that war meant people fought.  We let him lead the discussion and ask the questions he wanted answered: its surprising sometimes what kids are interested in knowing and what they overlook.  Last year he understood that people have fought to protect Canada and that some of them died.  Because they did / do such important jobs, we wear poppies to remember them.
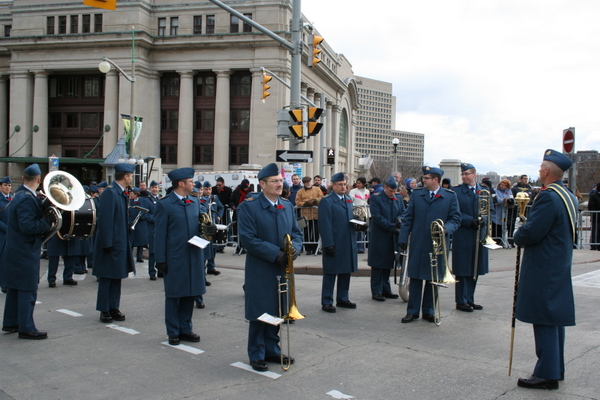
Before you talk about Remembrance Day with your kids I think its helpful to think about your values and what you want your children to understand about war. How do you talk about death in your family?  What are your values about guns and violence?  I ask these questions because I've been got off-guard by what my firefighter has asked.

How have you explained Remembrance Day to your children?

Sara is mom to 4-year-old ” firefighter” and 2-year-old “monkey”.  You can find her at her blog, My Points of View.

Photography : time to hit print

by Sara If you're like most parents you probably have hundreds if not thousands of photos stored on your computer or your camera's memory card.  And if you're like most parents the most recent photos on your walls are probably from two years ago.

With digital photography it's a lot easier to take and store photographs but it also makes it a lot harder to print and frame them since you can see them anytime you want on your computer.

Here's my advice: Just do it!  Just print your photos.

They don't need to be professional shots; they can be any photo you love, like, or even just a moment you want to remember.  They don't have to be huge: 5x7 or 8x10 will do.  They don't have to be expensive; may I suggest Costco or www.kodakgallery.ca (they ship to your house for $2.99)? They don't need to be professionally framed; all my frames are the Ribba series from IKEA (a nice 8x10 frame, with mat, is $12.99).  If the thought of creating a symmetrical arrangement is stressful then just hang them willy-nilly in a cluster at different heights and different spacing's so that the chaos looks intentional ;)  Or hang just one on each wall (make sure its proportional to the wall - the massive two-storey space in your living room needs more than a 5x7): I hang most of my 5x7's on the those awkward 1.5-3 foot spaces in between doors and rooms.

I have several poster-size enlargements in my living room / dining room / studio and those photos haven't been rotated or changed in over a year.  I'm hoping to get some new shots from our upcoming family photo session to replace the ones that are framed.  The rest of the photos in the house (mainly 8x10's) are changed every 4-12 months.  The photos I take down are either passed on to family members, put in an album, discarded, or, for larger prints, stored in an Artist Portfolio & Presentation Book (like this one, available in different sizes at Michael's).

I think choosing which photos to print is often paralyzing: it's not perfect; not everyone loves it; I'm not sure if I should choose this one or this one; I don't know where to hang it etc.  As a photographer, I still face the same dilemma - too many photos, not enough walls, not enough time.  My first step is always deciding where I wanted to hang photos, choosing what size frames I wanted on those walls, and then choosing the photos to fill those spaces.

Sara is a photographer and mom to a 5-year-old ” firefighter” and 3-year-old “monkey”.  You can also find her at her blog, My Points of View.

Found Art

by Sara

It has been a long winter!  You can tell by the dregs of what's left in our arts and crafts cupboard that we're long overdue for some nice weather so we can get outside and play.

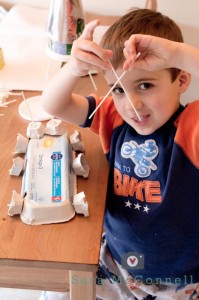
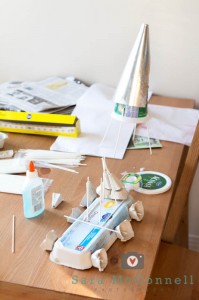
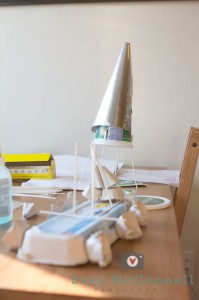
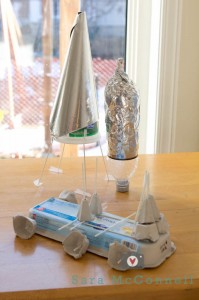
Our recent art and craft endeavors have involved 'found' items from our recycling container.  The firefighter used an empty egg  carton and leftover lollipop sticks to create a transport truck.  He used the same sticks, a yogurt container, and tinfoil to create a rocket ship.

For 'found' object arts and crafts projects you really only need glue, tape, scissors, crayons and markers.  As the project evolves, you might get out other supplies from your arts and crafts cupboard like pipe cleaners or stickers.

The 5 year old firefighter created a rocket ship for his brother out of an empty plastic bottle and tinfoil.  We've made bird feeders out of plastic coffee containers and binoculars and periscopes out of empty paper towel rolls.  Empty Kleenex boxes are great for making buildings and vehicles and small plastic containers (applesauce or yogurt) can be added as wheels are compartments.

What items from your recycling box have you used for arts and crafts projects?

Sara is a photographer and mom to a 5-year-old ” firefighter” and 2.5-year-old “monkey”.  You can also find her at her blog, My Points of View.

Painting with Marbles

by Sara Every two weeks I volunteer in my son's Junior Kindergarten classroom and I will admit that it's a great source of inspiration for art and craft projects.

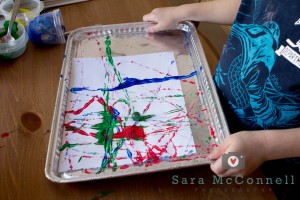
On my most recent visit we used marbles to paint pictures, something even I remember doing in elementary school!

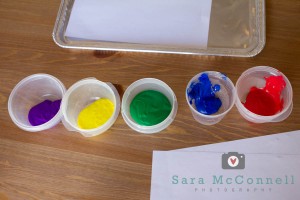
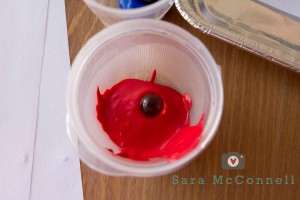
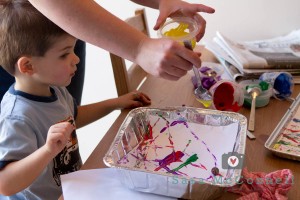
Once you decide how many colours you'd like to use, choose small containers to pour the paint into.  You only need enough paint to cover a marble.

Place a marble into each container and use a plastic spoon to cover the marbles with paint. We used our 'for food' spoons and it was a bit of a disaster: they were too heavy and kept tipping the paint containers over and spilling the contents all over the kitchen table.

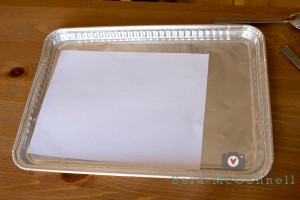
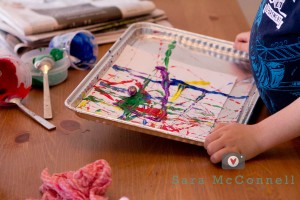
We used three different tin trays for this project: one with shallow edges, one with edges that were about 1.5 inches high, and another with edges over 2 inches high.

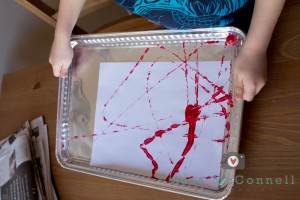
Whether or not the marble will fly out of the tray (which it did from all 3 of our trays) depends more on the enthusiasm with which the painter rolls the marble around than the depth of the tray.  Although based on the enthusiasm to depth ratio, I'd suggest the 1.5 inch deep tray :)

While we rolled the marble around we talked about the directions you could move the tray in (in a circle, square, back and forth, side to side) as well as the colours we created by mixing different colours of paint.

Even the 2.5 year old monkey got in on the marble rolling action.  Despite giving him the deepest tray he still managed to launch the marble onto the floor the most frequently!

This is definitely a messy activity so I'd suggest a table in the kitchen away from the walls (when the marble launches it tends to splatter) but I think that the colourful paintings we created were well worth the mess!

Sara is a photographer and mom to a 5-year-old ” firefighter” and 2.5-year-old “monkey”.  You can also find her at her blog, My Points of View.

Spaghetti and Marshmallows

by Sara Thankfully this is not a cooking post!

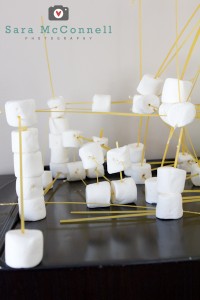
The idea to build structures out of marshmallows and spaghetti came from our wonderful mother's helper, Liz, who spends one day a week with us.  I provided the materials and the pictures while she and my 5 year old firefighter came up with a masterful creation!

All you need is large marshmallows (you can incorporate small ones too but they're probably best for older kids as their size makes them harder to slide pasta through) and pasta.  Liz suggested linguini noodles because they're thicker than spaghetti but still slide into the marshmallows easily.  I do reccommend white pasta over whole wheat as its tougher and less likely to snap. 

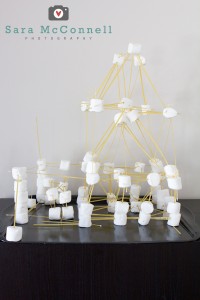
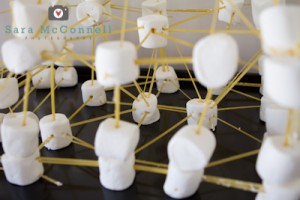
Its a sticky process but kids are only limited by their imagination.  The firefighter designed the tall tower and then decided to attach a garage (see the above image).  The small creation inside the garage is the car he built. 

As you can see from the image above, the creations tend to collapse easily so they need a lot of supporting 'beams' to hold them upright. 

Preschool children might find it easiest to make simple shapes or people and animals while kindergarten kids (with assistance) can build towers or buildings.  School-aged children might appreciate the challenge of trying to replicate the different types of bridges using marshmallows and pasta. 

Have you ever built anything out of marshmallows and pasta?

Sara is a photographer and mom to a 5-year-old ” firefighter” and 2.5-year-old “monkey”.  You can also find her at her blog, My Points of View.

Powered by Squarespace