Activities to do With Older Kids: DIY Appliqued Duvet Cover

by Jordan Over the Easter weekend, my husband Brian and I took on a giant project: an appliqued duvet cover. It sounds easy, but it turned out to be four days of ironing, cutting, ironing, cutting, and ironing…when we finished it, though, I realized it was also an awesome project for a kid’s room. So, if you have a crafting buddy, a ton of patience, and don’t mind ironing a lot, you may want to try this project out for your child. Just a note that this project is better left to the adults; surprise your little one with the end result. I picture this working particularly well for those parents out there whose kids are fanatical about a particular theme that is hard to find or overpriced to purchase.

Here’s how you can do this for yourself:

YOU WILL NEED:

  • a duvet cover. We got ours for $14.00 with pillowcases, at IKEA. Cotton is probably best.
  • scraps of fabric: felt, cottons, flannel
  • buttons as accents
  • Fabric glue: I love Aleene’s, if you can find it.
  • iron-on adhesive interfacing
  • scissors and sewing basics
  • parchment paper or cardstock
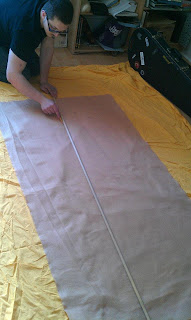
  • large surface to work on
  • a co-pilot. This is a two-person job.

WHAT TO DO:

1. Prep your duvet cover by washing and drying it. Don’t use any fabric softener: it will interfere with your adhesives. When it’s dry, iron it out.
2. Choose a design (we got some ideas off the internet), and choose your fabric accordingly.
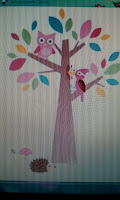
3. Start drawing out your designs onto the fabric and cutting. Practice placing the pieces out.

Keep cutting.

And cutting.
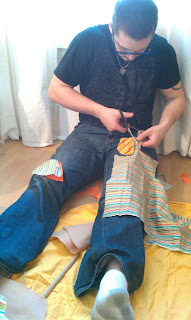
And placing.

4. Iron all your pieces perfectly. I recommend throwing on a TV show.

5. Lay out your big sheet of interfacing. We got a bulk roll at Fabricland for 16.00. Place your pieces on it. We were careful to squish everything close together, yet we still ran out of interfacing. (This is when the fabric glue steps in.)

6. Iron the interfacing onto the fabric. We couldn’t flip the sheets over without displacing all our placement of the fabric pieces, so we lay file folders (ie cardstock) over the top of everything and just ironed a little longer than directed. Worked great.

7. Cut out all those fabric shapes again. Yyyyyyyep, it’s as much fun as it sounds.
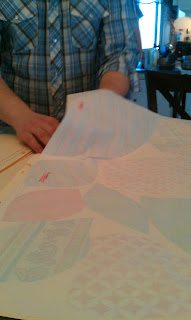
8. Lay out all your pieces on your duvet cover, likely on the floor unless you have the biggest table ever. Follow the directions for ironing your pieces down. Because we had extra leaves, and the branches of the tree didn’t fit onto the interfacing sheets, we used fabric glue for some pieces. In retrospect, I might have used it on everything if I could have guaranteed that I wouldn’t get any ‘wet’ looking spots. The interfacing is stiff and has a ‘crinkly’ quality that is unfortunate, but I think it’ll soften over time.

9. Finishing touches: Brian sewed the owl’s button eyes into place. We’ll have to re-iron a few spots on the tree trunk where the interfacing didn’t quite meld with the duvet cover. But other than that, it’s pretty freakin’ spectacular!

This project took at least 8 hours spread out over 3 days. There were points where we were snapping at each other, where we fought over who lost the scissors, and where my hands were literally coated in fabric glue. We also went over our intended budget: I thought I’d have enough fabric at home to make all the leaves, but it turns out I didn’t have things on theme. Between the plain duvet cover set ($14), the fabric ($40 with lots left over) and the interfacing ($16), we spent $70 on this project. While I recognize that’s not much for a duvet cover, it’s a lot for a craft project that had a high chance of failing.

But, hurray, it didn’t fail. And now we have a personalized, on-theme bedding set that we absolutely adore. Because it’s surprisingly hard to find owl-and-mushroom themed bedding for grown-up beds. Perhaps you have an ‘old soul’ child, one that would prefer Paris-themed covers, or calculus-themed covers? Really, this project can be anything you want it to be. Just remember, if you make this with your spouse/partner, I can’t guarantee you’ll both emerge alive…or at least not with all your digits in tact.

*****

Jordan is one-half of the team that makes up Project: Priceless. Together, she and her husband, Brian, write The NEST. They are newlyweds living in Hintonburg/Wellington West--the artsy, hands-on, ultra-urban centre of Ottawa. They have no plans for kids, but do have a dog and plan to get another one when the time comes. In the meantime, they're blogging their married adventures together and have a particular fondness for DIY projects.

Beading with kids

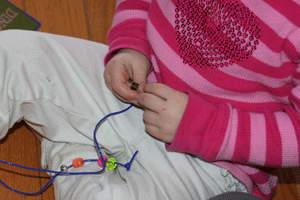
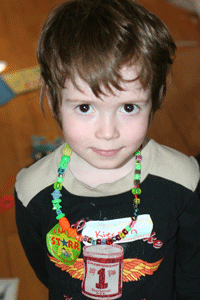
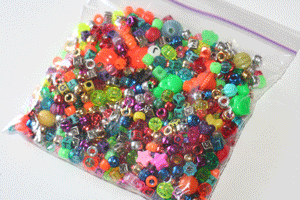
by Lara I'll readily admit that at a few months shy of three I didn't think my twins were ready to start making necklaces with beads - which is where I apparently wasn't giving them enough credit. They came home with some fun necklaces for the sitter's one day and I realized what a great activity making necklaces was for home too.

What you need:

- beads with a big opening (we have a big mix that came from garage sales and past crafting adventures my sister had, but you can easily get them at any craft store)

- something to thread the beads onto.  Yarn works with tape wrapped around the end to make it easier to thread into the beads. I also find gimp/plastic lace works really well

- Patience (the necklaces don't tend to get finished in one go and sometimes it's a lot of fun to throw the whole pile of beads on the floor and watch your mother's head explode)

It's a great activity that is fabulous for practicing hand eye coordination and the kids have a fun necklace to show off and play dress up with later.

Have you tried making necklaces with your kids?

Lara is mom to five year old Kiernan and two and a half year old boy/girl twins Quinn and Juliette.  Between the kids and her social media consulting business, she spends most of her time running frazzled.

Enhanced by Zemanta

Kids Create! March Craft Carnival {GREEN}

by Alicia March 2011 Theme – GREEN

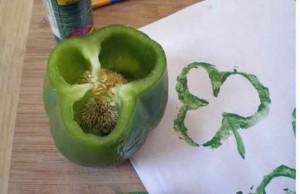
Spring in the air! I think. Let's celebrate March by crafting with our children not only using the colour green (I'm thinking luscious green grass, new green leaves on the trees and St. Patrick' day shamrocks!), but also "going green" by choosing eco-friendly crafts.  I personally like to choose our crafts using recyclables around the house (toilet paper rolls, egg cartons, cardboard boxes) and I always love finding a way to use nature (sticks, leaves, vegetables) in our crafts. How will you craft with the colour green? What does a green theme mean to you?

What is the Kids Create! Craft Carnival? A carnival is a blog article that contains links to other articles covering a specific topic. Think of it as a craft party, where everyone has to show up with a craft based on the same topic. Use this carnival to encourage your family to create crafts and memories together!

Who can participate? All KITC readers! Whether you have a blog or not, we have a way you can participate!

When? Throughout the month you are encouraged to make a craft with your children based on the monthly theme and post your finished project to share with others. Make and share as many crafts as you want according to the theme before the end of the month deadline. Crafts you have made in the past are also welcome, but new crafts are encouraged. Once the deadline has passed we will showcase the crafts and announce the following month’s theme.

Where and how do we post our crafts? There is a link-up widget at the bottom of this post. If you are blogger, post about your craft on your blog and link below to your post. If you do not have a blog, use the KITC Flickr group to upload a picture of your craft (make sure to include your name and a written description of your craft). Read more information here on how to use Flickr and how to join the KITC Flickr Group.

Deadline to submit: Saturday, March 31st

What will your family create?

Thank you to those who participated in last month’s craft carnival! February’s theme was LOVE and KINDESS and we had a few really creative submissions. Check them out!

Alicia is mother to E (2 ¾) and blogs at I Found My Feet.

Enhanced by Zemanta

How To Make Reusable Non-Toxic Dryer Sheets and More

by Gwen Since I've discovered Pinterest, I can't begin to tell you how many new recipes I have tried, how many DIY's I have done and how many new things I have learned. It is such a great way to share the millions of ideas found on the internet and an even greater way to bookmark, or "pin" what interests you so you can come back to it later.

In the past week, I have pinned lots :) Here are 3 of my faves:

How to make reusable and non-toxic dryer sheets - We all know that store bought dryer sheets are not healthy for us right? Follow the step-by-step instructions in this post to make your own eco-friendly, safe and effective dryer sheets.   Image credit: Live Renewed Blog

What to Do With Broken Crayons - If you have kids, you have broken crayons lying around your house. I know I sure do. This post lists 10 eco-friendly and creative ways to re-use them. No need to keep throwing them out!

DIY Felt Food - I have a thing for felt food. I just think they are all so adorable! And yes, my kids love them too :) So when I came across this  DIY felt food kit on Etsy, I took note and pinned it. The price is very reasonable for what you get and once you are finished making everything, you'll have the satisfaction of saying you made them with your own 2 hands!   Image credit: sweetemmajean on etsy

Do you have a favourite eco-friendly pin? If so, please share it in the comments!

Gwen is a mom of 2 and owns/operates Nayla Natural Care, an online store that specializes in carrying the best organic, natural and eco-friendly products.

Enhanced by Zemanta

Making Treats For The Birds

by Nicki Having grown up in a rural area, with nature loving parents and grandparents, feeding the birds was just something that we did.  My mom still has numerous bird feeders that she keeps filled and between her and my grandfather, her father, can identify just about any bird that flies into their yard.  They both loved teaching us kids about the birds that visited. 100_3033 Living in a rural part of Ottawa, I now have followed in my mother's footsteps, I usually have three feeders hanging my yard for the winter, Liam and spend lots of time sitting at the dining room window, watching the birds nibble at the seeds we put out for them.  Liam was thrilled to get his very own bird feeder as a Christmas gift from my aunt and uncle! 100_3036 This past fall, on a blustery, cold day when Liam insisted on going out side to play, he discovered the pine tree at the end of our front yard.  And the discovered treasures . . . pine cones!  In typical little boy fashion, he NEEDED to collect as many as he could and thought that they all needed to come into the house.  We agreed (and by agreed I told him) that we would bring them in but not to play with.  We would save them for the winter and make treats for the birds with them.

So, when he found the bucket of pine cones not long ago, how could a resist when he asked to make treats for his birds.  We spent a fun filled, messy hour making these tasty bird treats!

Unfortunately, we didn't get to see the birds munching on these, there were signs that they had been eating seeds when we weren't looking and then a silly squirrel (well, we are assuming it was a squirrel by the foot prints in the snow) stole them all!  But, I guess squirrels need treats sometimes too!

Pine Cone Bird Treats 100_3011 Materials:

pine cones, peanut butter, bird seed, string 100_2998

Directions:

1. Attach a string for hanging to pine cone.

2. Spread peanut butter over the pine cone. 100_3006 3. Dip pine cone in bird seed. 100_3008 4. Hang outside for birds to nibble. 100_3018

*****  For those of you who may have a peanut allergy in the family, you can substitute lard, shortening or any other spreadable, edible product for peanut butter!***


Nicki is mom to 3 year old Liam.  She is an ECE,  who loves to garden, scrapbook, write and take photos. She blogs about the randomness that is her life at Perils of a Working Mom